
Stripping the video from an MP4 file to get an audio-only MP3 is one of the most common and useful file conversions out there. It’s the fastest way to pull the audio from a video, leaving you with a much smaller file that’s perfect for listening on the go.
Whether you're building a playlist from live music videos or saving a long lecture for your commute, knowing how to change an mp4 to mp3 format is a fundamental skill for anyone who juggles digital media.
Why You Need to Convert MP4 to MP3
Ever find an incredible live performance on video and wish you could just add the song to your running playlist? Or maybe you have a two-hour webinar recording you need to listen to, but you can’t be glued to a screen. These are the exact moments where converting an MP4 to MP3 format becomes a game-changer.
The reason is simple and comes down to what these files are built for. An MP4 is a container, a digital box holding both video and audio streams together. An MP3, on the other hand, is pure audio. That specialization is its superpower.
This quick decision tree shows exactly when a conversion makes the most sense.
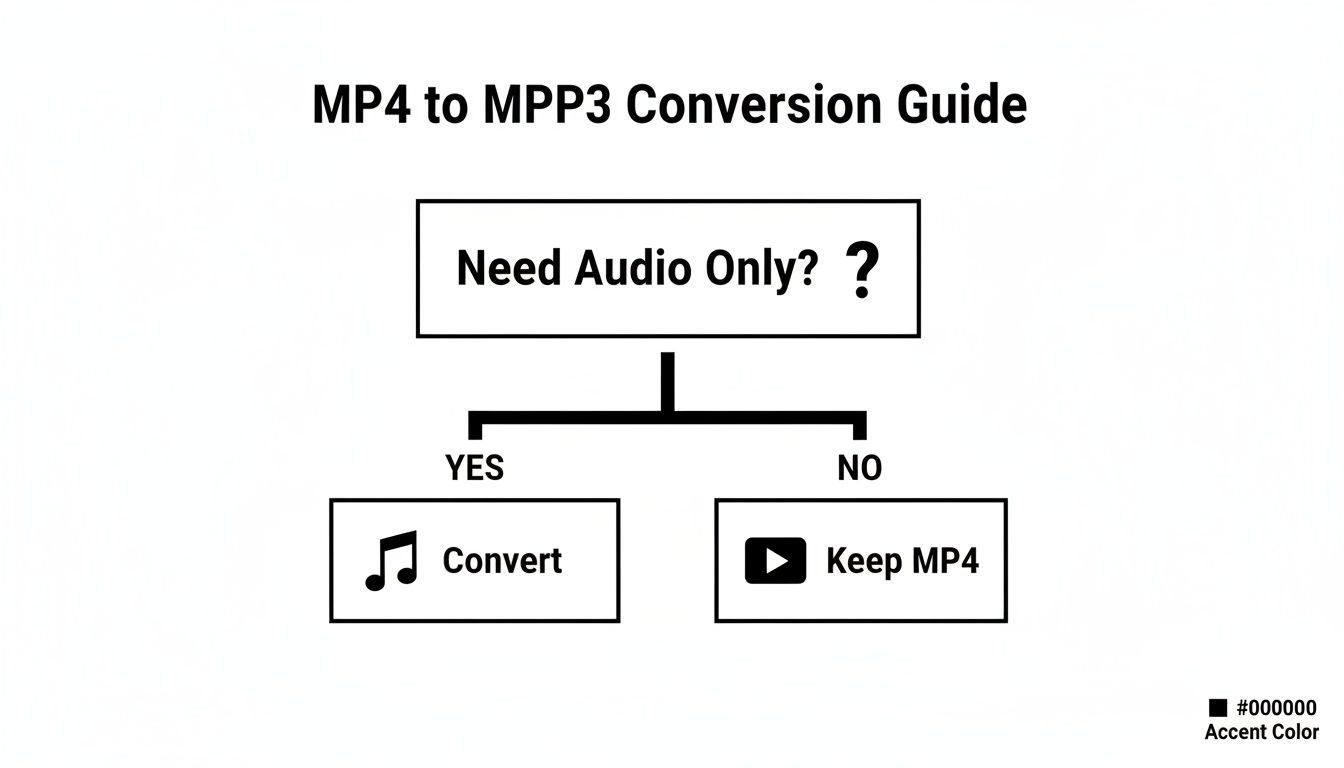
The takeaway is clear: if you only need to listen, converting the file is the smartest move you can make.
The Practical Benefits of an MP3 File
When you slice away the video component, you’re left with a nimble audio file that offers some serious real-world advantages.
- Significantly Smaller File Sizes: Without all that heavy video data, MP3s are just a fraction of the original MP4's size. This frees up precious storage space on your phone, laptop, or cloud drive.
- Universal Audio Playback: MP3 is the undisputed king of audio formats. Nearly every device imaginable—from your car stereo and smart speaker to that old portable player in your desk drawer—can handle it without a problem.
- Reduced Data and Battery Usage: Playing an audio-only file uses way less mobile data and battery power than streaming a full video. It’s the perfect format for listening when you're out and about.
- Easier to Organize and Share: Audio files are much simpler to manage in music libraries like Spotify or Apple Music. Plus, zipping a small MP3 over to a friend is a lot faster than trying to send a massive video file.
For most people, it all boils down to pure convenience. Turning a video lecture into an MP3 means you can absorb the content while driving, working out, or doing chores—times when watching a screen just isn't an option.
Common Scenarios for Conversion
The need to switch from an MP4 to MP3 format pops up all the time. Podcasters and journalists often need to prep audio files for transcription services, and a lightweight MP3 is the ideal input. You might have a huge collection of music videos and want to create a road trip playlist from them.
A particularly common use case is pulling audio from online videos. If that's what you're after, our guide on how to handle a YouTube to MP3 conversion covers that specific workflow. Understanding these practical applications shows why knowing how to convert files is such a handy skill to have in your digital toolkit.
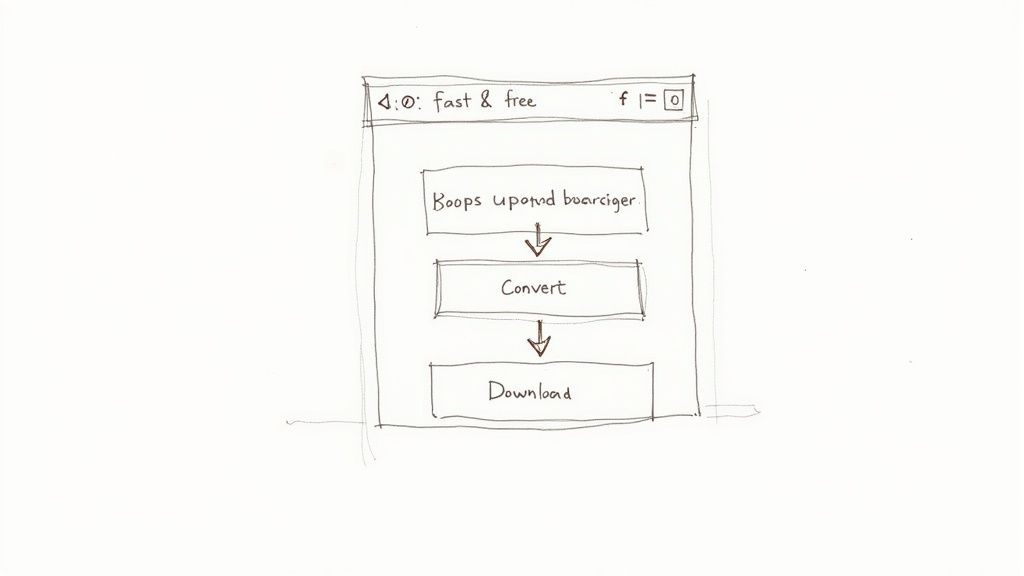
Fast and Free Online Conversion Tools
When you just need the audio from a single video file right now—without the headache of downloading and installing software—online converters are your best friend. These browser-based tools are built for speed and simplicity, making them the perfect fix for quick, one-off tasks. One excellent option is the meowtxt converter, which handles the entire process in just a few clicks.
The whole thing happens in your web browser, which means you can use them from any computer, anywhere.

The workflow is almost always the same: upload your MP4, let the service process it on their servers, and then download the finished MP3. It’s a straightforward approach that gets the job done with zero fuss.
A Practical Walkthrough with an Online Converter
Let's walk through a real-world example to see just how easy this is. Most online tools follow a similar three-step model. A service like the Meowtxt MP4 to MP3 converter, for instance, makes the whole process feel almost instant.
Here’s how it usually goes down:
- Upload Your File: You’ll see a big button prompting you to select your MP4. Most modern sites also let you just drag and drop the file directly onto the page.
- Start the Conversion: Once it's uploaded, you hit "Convert." The tool handles all the technical stuff behind the scenes, stripping the video data and re-encoding the audio into the MP4 to MP3 format.
- Download the Audio: After a few moments, a download link for your shiny new MP3 file pops up. Click it, and the audio saves directly to your device, ready to go.
This simple workflow is the main appeal. No settings to configure, no software to update—just a direct path from video to audio.
The core benefit of online converters is immediacy. They eliminate the barrier of installation, allowing you to get your audio file in seconds, which is perfect for when you're on a deadline or using a computer that isn't your own.
Key Considerations and Trade-Offs
While they are incredibly convenient, online tools do come with a few trade-offs you should know about. Understanding these limitations helps you decide when a browser-based tool is the right call.
- File Size Limits: Most free services cap the size of the MP4 you can upload. This is rarely an issue for short clips, but it can be a dealbreaker for full-length movies or long lectures.
- Internet Connection Required: The entire process hinges on a stable internet connection. Uploading a large video on a weak network can be painfully slow, and any interruption might force you to start over.
- Privacy Concerns: Remember, you're uploading your file to a third-party server. If the content is sensitive—like a private business meeting or a personal recording—using an offline desktop app is a much safer bet.
For specific jobs like pulling audio from online videos, you'll also find dedicated YouTube to MP3 converter tools. But when it comes to non-sensitive files and quick turnarounds, the sheer accessibility of online converters is tough to beat.
When Desktop Software Gives You Better Quality Control
Online converters are fantastic when you just need something fast. But for those times when you need more horsepower and control over the final audio file, desktop software is the undeniable champion.
If you’re dealing with high-fidelity audio, processing a whole batch of files at once, or working with sensitive content, an application running right on your computer is the way to go. You get complete command over settings like bitrate and audio channels, all without needing an internet connection.
This offline approach is a huge plus for privacy and handling large files. You’re not uploading anything to a third-party server, and you won’t run into the file size limits common with browser-based tools. For a deeper dive into professional-grade desktop options, this review of the 12 Best Video Converter for Mac Options is a great resource.
Let’s walk through two of the most powerful—and completely free—tools you can use: VLC Media Player and Audacity.
Effortless Conversions with VLC Media Player
Most of us know VLC as the media player that handles literally any file format you throw at it. What’s less known is that it has a powerful conversion tool tucked away in its menus. It’s a super reliable way to change an MP4 to MP3 format without installing any extra software.
Here’s the simple breakdown of how it’s done:
- Find the Conversion Tool: In VLC, head up to the Media menu and click Convert / Save.
- Add Your File: A new window will pop up. Hit the Add button and browse your computer for the MP4 you want to convert.
- Choose Your Output: After adding the file, click the Convert / Save button at the bottom. In the next screen, find the Profile dropdown menu and select Audio - MP3.
- Set the Destination: Last step. Click the Browse button to pick where you want to save the new MP3 and give it a name. Hit Start, and VLC will do its thing.
This whole process is incredibly efficient for simple audio extraction. You get a high-quality MP3 in just a few clicks, making VLC a go-to for anyone who already has it on their machine.
Fine-Tuning Audio with Audacity
When a basic conversion isn’t enough, Audacity is the perfect tool for the job. It's a professional-grade, open-source audio editor that doesn't just convert your file—it lets you edit the audio before you save it. This is perfect for trimming out silence, boosting quiet parts, or cleaning up background noise.
To use Audacity for this, you’ll need to install the free FFmpeg library first. This little add-on is what lets the software import audio directly from video files. Once that's set up, the process is dead simple:
- Import the MP4: Go to File > Open and select your MP4 video. Audacity will automatically pull out the audio and show you the waveform.
- Edit as Needed: Now’s your chance to make it perfect. You can select and delete sections, apply noise reduction, or normalize the volume so it sounds consistent.
- Export to MP3: Once you’re happy with it, go to File > Export > Export as MP3. Here, you can set the bitrate quality—320 kbps is fantastic for music—and even add metadata like the artist and album name before you save.
Using a dedicated audio editor like Audacity gives you surgical precision. It turns a simple file conversion into an opportunity to polish your audio, making sure it’s ready for anything you throw at it.
To help you decide which path to take, here’s a quick comparison of the two main approaches.
Comparing Conversion Methods for MP4 to MP3 Format
| Feature | Online Converters (e.g., Meowtxt) | Desktop Software (e.g., VLC, Audacity) |
|---|---|---|
| Best For | Quick, single-file conversions on any device. | High-quality, batch processing, and offline use. |
| Pros | No installation needed. Easy to use. Accessible anywhere. | Full control over quality settings. No file size limits. Enhanced privacy. |
| Cons | Requires an internet connection. Potential privacy risks. Often has file size limits and ads. | Requires software installation. Can have a steeper learning curve (especially Audacity). |
Ultimately, both online and desktop tools have their place. For a fast, no-fuss conversion, a web tool works great. But when quality, control, and privacy matter most, desktop software is the clear winner.
Advanced Conversion with Command-Line Tools
When you need to automate your workflow or process a huge number of files with absolute precision, the command line is your best friend. While graphical interfaces are easy to get started with, they can't touch the raw power and scriptability of a tool like FFmpeg—the open-source powerhouse for handling just about any multimedia file you can throw at it.
Think of FFmpeg as the engine running under the hood of many popular video and audio converters. By using it directly, you get total control over every tiny detail of the conversion process. This makes it perfect for repetitive tasks and building custom workflows, especially if you need to convert mp4 to mp3 format on a regular basis. The potential for automation is massive.
Getting Started with a Basic Conversion
First, you'll need to get FFmpeg installed on your system (it’s available for Windows, macOS, and Linux). Once that’s done, running a basic conversion is surprisingly simple. Just open your terminal or command prompt, navigate to the folder where your video lives, and run a single command.
Here's the most straightforward command to rip the audio track:
ffmpeg -i input_video.mp4 output_audio.mp3
In this command, -i just means "input," which you follow with your source MP4 file. The last part is whatever you want to name your shiny new MP3 file. FFmpeg is smart enough to figure out the rest, creating a high-quality audio file with its default settings.
Controlling Audio Quality with Bitrate
The default settings are pretty good, but what if you need to fine-tune the final quality and file size? This is where FFmpeg really flexes its muscles. You can easily specify the audio bitrate—that's the amount of data used to encode the audio per second—using the -ab flag.
For example, to create a high-fidelity MP3 perfect for music, you can crank the bitrate up to 320 kbps:
ffmpeg -i input_video.mp4 -ab 320k output_audio_high_quality.mp3
On the flip side, if you're just converting a podcast or a lecture where top-tier audio isn't critical, you could use a lower bitrate like 128 kbps to shrink the file size:
ffmpeg -i input_video.mp4 -ab 128k output_audio_smaller_file.mp3
This kind of control is crucial for optimizing files for different uses, from archival-quality music to small, shareable voice notes.
The demand for these capabilities is bigger than you might think. The global online video downloader market, which often involves extracting MP3s, was valued at over $2 billion and is projected to hit $4 billion by 2035. If you're curious, you can learn more about the online video downloader market trends.
Automating with Batch Conversions
The real magic of the command line, though, is handling tasks in bulk. Let's say you have a folder with dozens of MP4 files that all need their audio extracted. Doing this one-by-one in a GUI tool would be painfully tedious. With a simple script, you can knock it all out at once.
Here's a basic for loop that works on macOS or Linux. It finds every MP4 file in the current folder and converts it:
for f in *.mp4; do ffmpeg -i "$f" "${f%.mp4}.mp3"; done
This one-liner cycles through each file ending in .mp4 and spits out a corresponding .mp3 file with the exact same name. It's a massive time-saver for anyone managing large media libraries.
Pro Tip: Don't forget about metadata! To make sure your artist, album, and track title information carries over from the video file, you can add the
-map_metadata 0flag to your command. This preserves those crucial details, keeping your audio library perfectly organized.
Optimizing Your MP3: Quality vs. File Size
So you've converted your MP4 to an MP3. You're almost done, but there's one last crucial step: tweaking the settings to get the perfect balance between audio quality and file size. After all, you don't need a massive, high-fidelity file for a quick voice note, and you definitely don't want a grainy, compressed track for your music library.
It all boils down to matching the file to its purpose, and the key to doing that is understanding bitrate.
Think of bitrate as the amount of data used to represent one second of audio. More data equals better sound but a bigger file. Less data shrinks the file size but can start to degrade the quality. Simple as that.
Finding the Right Bitrate
Picking the right bitrate is all about what’s in the audio file. You’ll usually see two options: Constant Bitrate (CBR), which keeps the data rate steady, and Variable Bitrate (VBR), which adjusts it based on how complex the sound is at any given moment. Honestly, for most situations, CBR is simpler and gets the job done perfectly.
Here’s a practical guide I use:
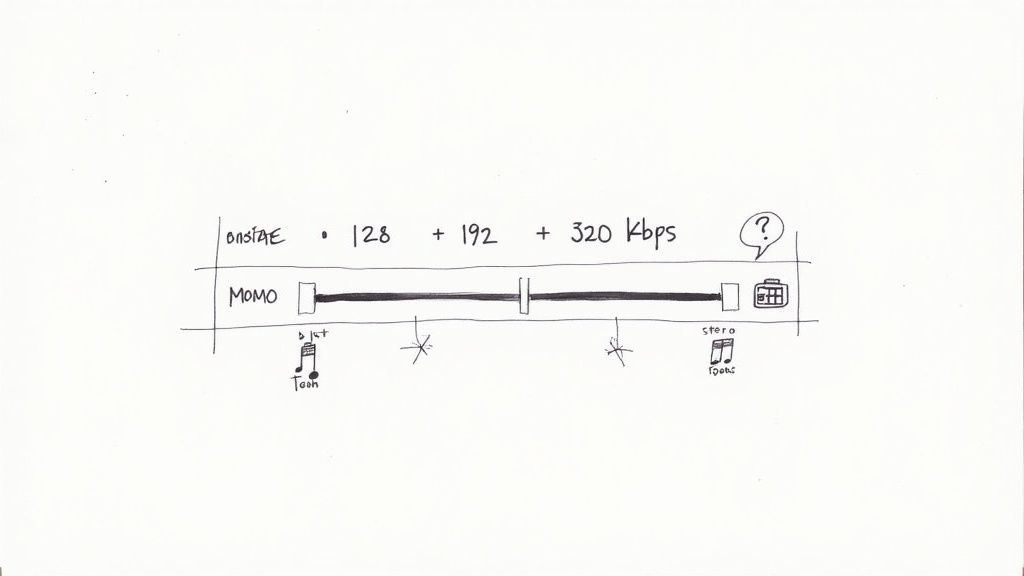
- 320 kbps: This is the gold standard for music. For most people, the quality is indistinguishable from a CD. If you're archiving your favorite albums or want the best possible listening experience, this is your setting.
- 192 kbps: A fantastic middle ground. You get great quality that’s more than enough for everyday listening—on your phone, in the car, wherever—but the file size is noticeably smaller than 320 kbps. It’s my go-to for general use.
- 128 kbps: This is the sweet spot for spoken-word content. Think podcasts, lectures, or interviews. The audio is perfectly clear for voice, and the tiny file size is a massive plus, especially for long recordings.
The need for well-optimized audio is a big deal. The audio format converter market is on track to hit $3.7 billion by 2033, which just shows how much audio content is being created and shared. You can discover more insights about audio market trends if you're curious about the numbers.
Other Key Audio Settings
Beyond bitrate, there are two other settings worth knowing about: sample rate and channels.
Sample rate is how many "snapshots" of the audio are taken each second. The standard for MP3s is 44.1 kHz, and it provides excellent quality. You can lower it to save a little more space, but you risk hearing a noticeable drop in quality, so I usually just leave it alone.
Channels let you choose between stereo (two channels, left and right) and mono (one channel). This is a simple but powerful way to save space. If your original recording is just one person talking—like a podcast or a voice memo—switching to mono can cut the file size nearly in half with zero perceived loss in quality. For music, though, you’ll almost always want to stick with stereo to preserve the full soundscape.
If you're looking to really shrink your files down, we have a whole guide on how to compress an MP3 that dives even deeper.
Still Have Questions About MP4 to MP3?
Even after you've picked a tool, a few common questions tend to pop up. Let's clear the air on some of the most frequent sticking points people run into when converting MP4 to MP3 format.
Getting these details right ensures you’re converting your files ethically and getting the best possible results.
Is It Legal to Convert MP4 Files to MP3?
This is a big one, and the answer comes down to ownership and what you plan to do with the file.
It's almost always perfectly legal to convert a video you created or own for your personal use. For example, if you have a phone recording of a family reunion, turning that into an MP3 to share with relatives is totally fine.
Where it gets tricky is with copyrighted material. Converting a music video you don't own and then sharing that MP3 file with others is illegal. The line in the sand is personal use versus distribution.
Will Converting to MP3 Hurt My Audio Quality?
Technically, a tiny bit—but it’s usually not something you'll notice. MP3 is a "lossy" format, which means some of the original audio data is strategically discarded to make the file much smaller.
But here’s the good news: if you use a high enough bitrate, like 320 kbps, the quality loss is practically imperceptible to the human ear. For spoken-word content like a lecture or podcast, even a lower bitrate like 128 kbps will sound perfectly clear.
Choosing the right bitrate is the single most important factor for preserving audio quality. For music, always aim for 192 kbps or higher to ensure a great listening experience.
Can I Convert a Video From a Streaming Service?
This is almost always a violation of the terms of service for platforms like YouTube, Netflix, or Spotify. These services are designed for streaming content directly, not for users to download and create their own permanent copies.
Trying to rip content from them can get you in hot water, as it can violate their policies and, in some cases, copyright law. It's always best to stick to converting content that you personally own or have explicit rights to use.
When you need to turn your audio or video into text, meowtxt provides fast, accurate transcriptions with AI-powered summaries and translations. Get started for free and see how easy it is to convert your files at meowtxt.com.


