If you want to drastically improve your audio quality, the secret isn't fancy software or an expensive microphone. It’s all about nailing the fundamentals: controlling your recording space, choosing the right gear, and refining your technique. Honestly, what you do before you hit record matters more than any fix you can apply in post-production.
Your Recording Environment Is Your First Priority
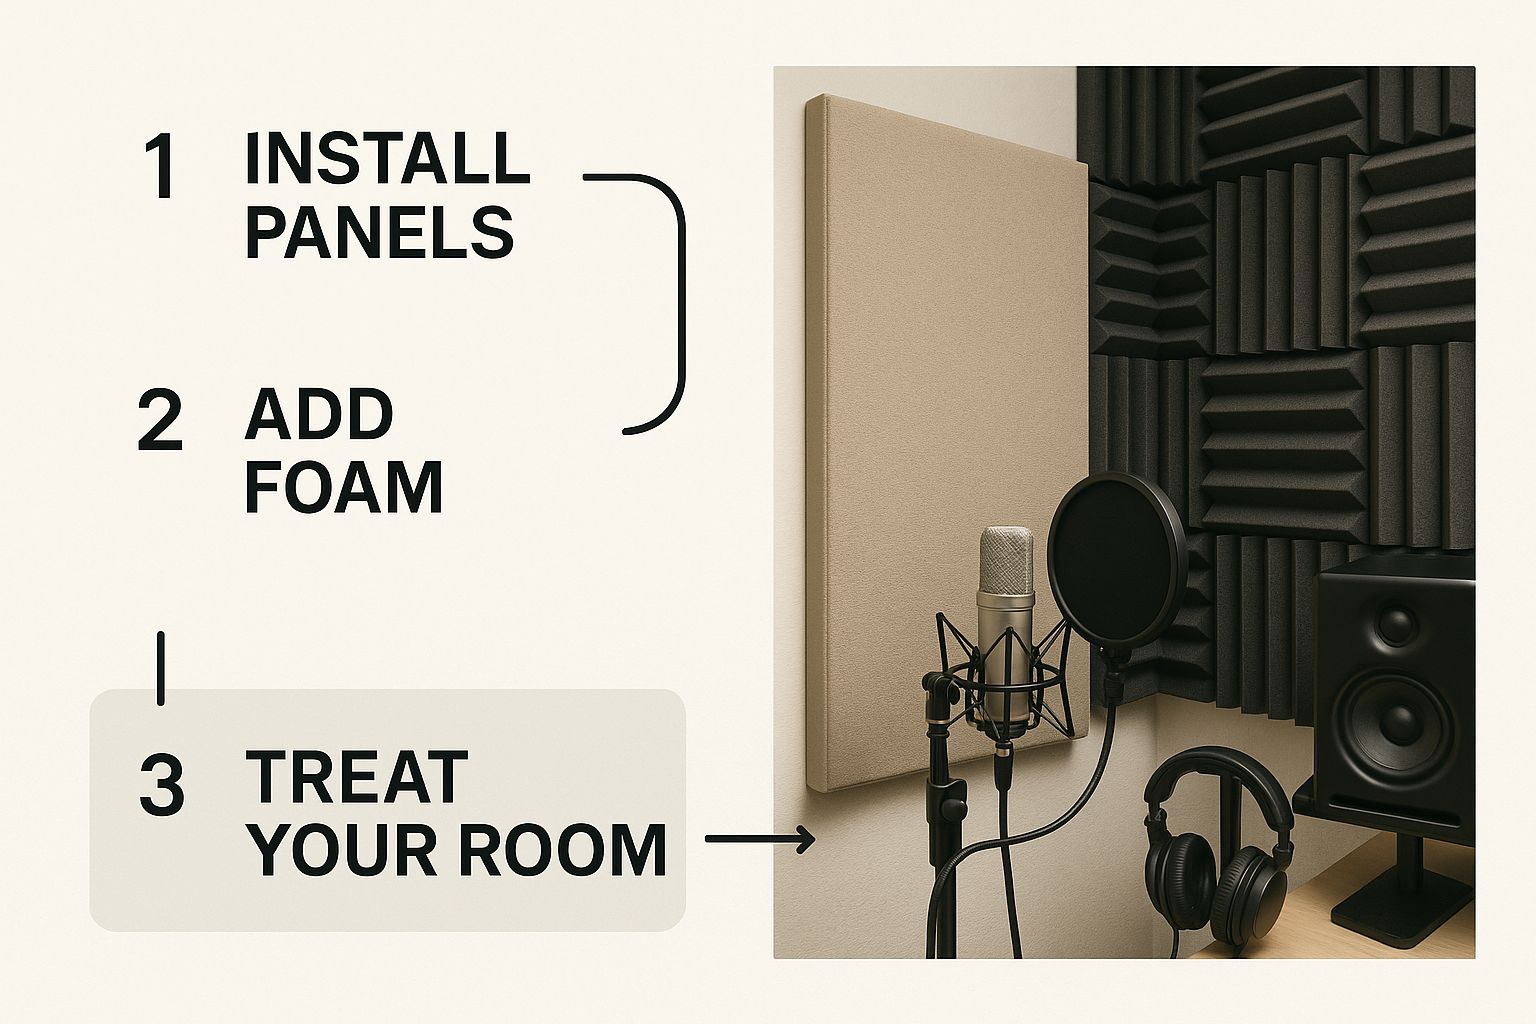
Before you even glance at a microphone catalog, look at the room you're in. This is, without a doubt, the single biggest factor in getting clean, professional audio. I'll say it again: a crisp recording from a $50 mic in a treated room will sound infinitely better than a muddy recording from a $1,000 mic in an echoey mess of a space.
Most people get tangled up in two concepts they think are the same: soundproofing and acoustic treatment. They’re not, and knowing the difference will save you a ton of time and money.
Soundproofing is about isolation. It stops outside noise—traffic, barking dogs, your roommate's TV—from getting into your room. True soundproofing is a construction project involving things like double-paned windows and dense, heavy doors. It’s expensive and often impractical.
Acoustic treatment is about controlling the sound inside the room. This is where you can make a huge impact. The goal is to kill the echo and reverb that happens when sound waves bounce off hard surfaces like walls, ceilings, and floors.
For most creators, acoustic treatment is the game-changer.
Taming Echo on a Budget
You don't need a pro studio. Your real enemy is any hard, reflective surface. Sound waves bounce off drywall, hardwood floors, and glass like a pinball, creating that hollow, amateurish echo.
Your mission? Absorb those reflections with anything soft, dense, or irregularly shaped.
- Start with the floor. Have hardwood or tile? Throw down a thick area rug. It’s one of the easiest and most effective first steps.
- Soften the walls. You don’t need to wallpaper your room in foam. A bookshelf filled with books of different sizes is a fantastic sound diffuser, breaking up reflections. Even hanging heavy blankets or thick towels on the walls can do wonders.
- Use your furniture. That soft fabric couch is an amazing bass trap, soaking up low-frequency rumble. A stack of pillows in a corner can absolutely help tame echo.
Pro Tip: Do the "clap test." Stand in your recording space and clap your hands once, loud. Hear a metallic ringing or a long, trailing echo? You've got reflective surfaces to deal with. Keep adding soft things until that clap sounds tight and clean, with almost no tail.
The Power of DIY Vocal Booths
If your room is just too lively, you can build a makeshift vocal booth. One of the best-kept secrets is recording inside a walk-in closet packed with clothes. All that hanging fabric creates a wonderfully dead space that's perfect for vocals.
No closet? No problem. Get creative. You can arrange couch cushions around your microphone or drape a heavy moving blanket over a couple of mic stands to build a little audio fort. The idea is simple: surround the mic with soft materials to stop room reflections from ever reaching it. This is a go-to trick for podcasters and voiceover artists recording at home.
This focus on a controlled environment isn't just a DIY hack; it's a core principle of the entire audio industry. The global sound quality testing market, valued at $2.61 billion in 2023, is expected to hit $4.26 billion by 2031. That growth shows just how seriously professionals and consumers take high-fidelity audio, which always starts with the room itself. You can find out more about the rising demand for high-quality audio to see where the industry is heading.
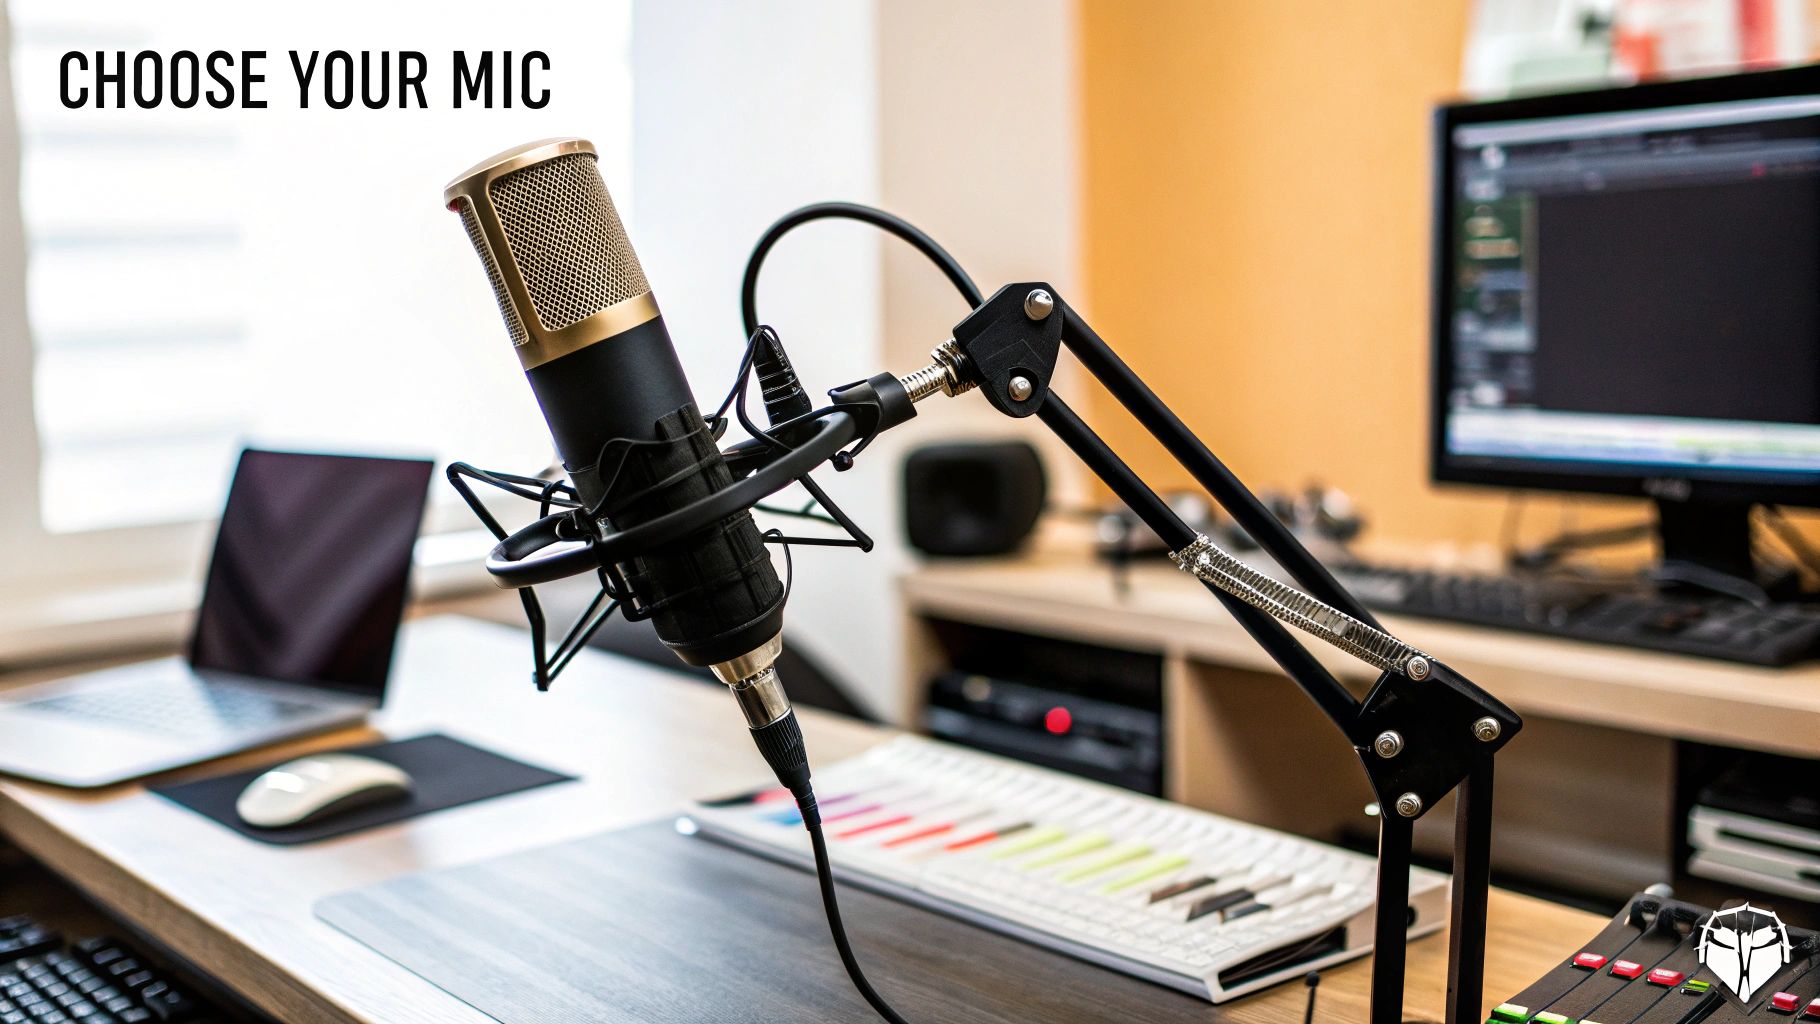
Choosing Your Microphone and Essential Gear
Okay, so you’ve tamed your recording space and it's sounding much cleaner. What's next? It's time to pick the gear that actually captures your voice. The microphone is the absolute heart of your setup, and while the options seem endless, it really boils down to a few key decisions.
Don't sweat it. The most important choice comes down to two main types: dynamic or condenser. Your recording environment—the very thing we just sorted out—is the biggest factor in this decision.
Think of it like this: a dynamic mic is tough and focused, like a reporter in a noisy crowd zeroing in on one person. A condenser mic is the sensitive artist, capturing every tiny detail in a quiet studio.
This image really drives home why we sorted the room out before even looking at mics.
Getting your room right first gives your microphone a massive head start, making its job way easier and the final result infinitely better.
H3: Dynamic Mics: The Workhorse for Imperfect Rooms
If you’re recording in a typical bedroom, home office, or any space that isn't a professional sound booth, a dynamic microphone will likely be your best friend. They are purposefully built to be less sensitive.
What does that mean for you? They are fantastic at ignoring background noise. They grab what’s right in front of them and push away the sounds from farther away—the hum of your computer, the traffic outside, you name it. It's why they're the standard for live concerts and radio broadcast booths. For new podcasters and streamers, a dynamic mic is a lifesaver.
H3: Condenser Mics: Capturing Every Last Detail
On the flip side, condenser microphones are all about sensitivity. They capture a massive range of frequencies and subtle sounds, giving you that crisp, detailed, and airy vocal tone you hear on professional studio recordings.
But that sensitivity is a double-edged sword. In an untreated room, a condenser will hear everything. The echo off your walls, the air conditioner kicking on, even you breathing. If you’ve put in the work to create a quiet, acoustically treated space, a condenser will reward you with absolutely stunning clarity. If not, you're signing up for an editing headache.
Microphone Type for Your Recording Needs
Choosing the right microphone is the cornerstone of great audio. This table breaks down the most common types to help you match a mic to your specific situation, whether you're in a treated studio or a spare bedroom.
| Microphone Type | Best For | Sensitivity | Common Use Cases |
|---|---|---|---|
| Dynamic | Untreated or noisy rooms, loud sources | Low | Podcasting, live vocals, radio broadcasting, drums |
| Condenser | Acoustically treated, quiet rooms | High | Studio vocals, acoustic instruments, voice-overs |
| Ribbon | Capturing warm, vintage, natural sound | Very High | Electric guitar amps, horns, specific vocal styles |
| Shotgun | Isolating sound from a distance outdoors | Directional | Filmmaking, field recording, on-camera dialogue |
Ultimately, the best microphone is the one that best suits your recording environment. For most creators starting out, a dynamic or condenser mic will be the top contender.
H3: Understanding Microphone Polar Patterns
Beyond the type, you need to know a mic's polar pattern. This is just a fancy term for the shape of the area where it's most sensitive to sound. For recording your voice, the one you'll see most often is cardioid.
- Cardioid: This is your go-to. It picks up sound from the front and rejects it from the sides and back. Think of it as a heart-shaped bubble pointing away from the mic stand. You speak into the front, and it ignores the room noise behind it.
- Omnidirectional: Hears everything, everywhere, all at once. It captures sound equally from all directions, which is great for recording a group discussion around one mic but terrible for isolating your voice.
- Bidirectional (Figure-8): Listens to the front and the back, but not the sides. It's perfect for a two-person interview where you're sitting across from each other with the mic in the middle.
For most of us creating content solo, a cardioid mic is the most practical choice by a long shot.
You might think this is overkill, but researchers at USC found that poor audio quality actually makes listeners perceive a speaker as less intelligent and their work less credible. Your gear isn't just gear; it's a direct reflection of your professionalism.
H3: The Essential Accessories You Can't Skip
Your mic is the star, but it needs a supporting cast. These two pieces of gear are absolutely non-negotiable for improving your audio quality.
An Audio Interface: This little box is the bridge between your XLR microphone and your computer. It converts the analog signal from your mic into a clean digital one. More importantly, its preamps are way better than what's built into your computer, meaning less hiss and a stronger signal. It also provides the 48V phantom power that condenser mics need to even turn on.
A Pop Filter: See that mesh or metal screen in front of a studio mic? That's a pop filter. Its only job is to stop the harsh blast of air from "p" and "b" sounds—known as plosives—from hitting the microphone and creating a loud, ugly "pop." This cheap accessory will save you an unbelievable amount of time fixing your audio later. It's an absolute must-have.
Mastering Your Recording Technique
Having professional gear is one thing, but knowing how to use it is what separates the pros from the amateurs. Honestly, your microphone technique can make or break your sound, often more than the price tag of your equipment. It's a skill that costs nothing to develop but pays off massively in the final quality.
Lots of beginners just focus on getting their voice recorded, but how you do it is everything. Little tweaks to your position and delivery can save you hours of cleanup in post-production. Let’s get into the practical skills that actually move the needle.
Finding the Sweet Spot for Your Mic
The first question I always get is, "How far should I be from the mic?" There’s no single right answer, but a fantastic rule of thumb is the "shaka" or "hang loose" hand gesture.
Just put your thumb on your chin and extend your pinky finger to touch the microphone. That distance—usually about 4 to 6 inches—is the perfect starting point for most vocal recordings.
If you're too far back, your voice will sound thin, distant, and full of room echo. But get too close, and you run into a different beast entirely: the proximity effect.
Consistency is everything. If you’re someone who leans in for emphasis or rocks back in your chair, that movement creates volume dips and spikes in your audio. Try to lock in your position for a smooth, professional sound.
Using the Proximity Effect to Your Advantage
The proximity effect is a quirk of directional mics (like the cardioid you're probably using) where bass frequencies get a serious boost the closer you get. This can be an incredible tool. Edging a little closer can add a warm, rich, "radio voice" quality.
But it's a double-edged sword. Get too close, and that lovely warmth turns into a boomy, muddy mess that kills your clarity. If your recordings sound muffled, the first thing to try is simply backing off an inch or two. Play around with it—find the distance that makes your voice shine.
How to Set Your Gain Levels Correctly
Before you even think about hitting record, you have to set your gain. Gain is just the input volume for your mic, controlled by a knob on your audio interface. Nailing this step is critical for avoiding the two cardinal sins of digital audio:
- Clipping: This is when your signal is too hot, creating a nasty digital distortion that sounds like a crackle. Clipped audio is basically ruined. You can’t fix it.
- A Noisy Signal: If the gain is too low, you’ll have to crank the volume in your software later. When you do, you also crank up the underlying hiss and background noise.
Here’s how to set it right: speak into the mic at the loudest you plan to get during your session. Watch the meter on your interface or in your software and aim for the peaks to bounce around -12dB to -10dB. This gives you plenty of headroom to avoid clipping while keeping your signal strong and clean.
Getting Rid of Mouth Noises and Breaths
Little clicks, lip smacks, and sharp inhales are incredibly distracting for a listener. While you can edit some of them out, it’s a tedious job. Prevention is always better.
- Stay hydrated. Room-temperature water is your best friend. Skip the coffee, dairy, or sugary drinks right before you record, as they can make things worse.
- Try a green apple. This is a classic voiceover artist trick for a reason. The tartness helps cut through sticky mouth noises.
- Go slightly off-axis. Don't talk directly into the front of the mic. By angling it just 15-20 degrees to the side, your breath won’t hit the diaphragm head-on, reducing plosives and breathiness without really changing your tone.
Getting these techniques down means your raw audio will be worlds cleaner. This groundwork makes every other part of the process—editing, mixing, mastering—so much easier and more effective.
Polishing Your Audio in Post-Production
Recording clean audio is more than half the battle, but post-production is where your sound truly goes from good to great. This stage can feel intimidating if you're not an audio engineer, but you don't need to be. A simple, logical workflow makes all the difference.
Think of it like finishing a piece of woodwork. You wouldn't skip sanding before you apply the stain, right? The same principle applies here. These steps are all about enhancing clarity, ensuring consistency, and delivering a listening experience that keeps your audience glued.
Start with Noise Reduction
First things first: clean up any unwanted background noise. This could be the subtle hiss from your equipment, the low hum of an air conditioner, or any other persistent sound that snuck into your recording. Most audio software, including free tools like Audacity, has a feature for this.
The process is pretty straightforward:
- Isolate the Noise: Find a few seconds in your recording where you aren't speaking. This little snippet is your "noise print"—a pure sample of the background sound you want to zap.
- Teach the Software: Use the "Noise Reduction" effect to analyze this sample. You're essentially teaching the tool what to listen for and ignore.
- Apply the Effect: Once it has the profile, apply the effect to your entire audio track. Be gentle with the settings. Overdoing it can make your voice sound thin or robotic. A little goes a long way.
This initial cleanup gives you a much better foundation to build upon.
Sculpt Your Sound with EQ
Equalization (EQ) is your most powerful tool for shaping sound. It lets you boost or cut specific frequencies to add clarity and remove any muddiness. For spoken word, the goal is almost always to make the voice clear and present.
A classic problem in home recordings is a build-up of low-end frequencies, making a voice sound boomy. A simple high-pass filter fixes this instantly. By cutting everything below around 80-100 Hz, you remove low-frequency rumble that adds nothing to vocal clarity.
From there, you can make surgical adjustments to really make your voice pop.
- Cut the Mids: A slight dip in the 250-500 Hz range often reduces a "boxy" or nasal tone.
- Boost the Highs: A gentle lift in the 2-5 kHz range adds presence and makes your speech easier to follow. A touch of "air" around 10-12 kHz can add a professional sparkle.
Key Takeaway: Think of EQ as a sculptor's chisel. You’re not adding anything new; you’re chipping away at the unnecessary bits to reveal the great-sounding voice underneath. A subtractive approach—cutting problem frequencies—is often more effective than boosting everything.
Add Consistency with Compression
Once your audio is clean and clear, it's time to tackle the dynamics. A compressor is a tool that automatically turns down the loudest parts of your audio and turns up the quietest parts. This creates a much more even, consistent listening experience so your audience isn't constantly reaching for the volume knob.
Imagine a guest who leans away from the mic when they talk quietly and leans in when they get excited. Compression smooths out those volume spikes and dips. For vocals, a gentle compression setting is usually all you need to sound balanced and professional without sounding squashed or unnatural.
The technology behind this has deep roots. It’s related to the work done by audio codecs, which are essential for compressing digital sound with minimal quality loss. In fact, the global audio codec market was valued at around $9.05 billion in 2023—a figure that shows just how critical this tech is for everything from streaming to smartphones. You can read more about the growing audio codec market and its impact.
Tame Harsh Sibilance with a De-Esser
The final touch in a basic vocal chain is often a De-Esser. This specialized tool specifically targets and reduces harsh "s" and "sh" sounds, known as sibilance. These high-frequency sounds can be incredibly jarring, especially for listeners wearing headphones.
A De-Esser works like a hyper-focused compressor, kicking in only when it detects those sharp sibilant frequencies. Applying a gentle De-Esser ensures your audio is smooth and pleasant from start to finish.
This four-step process—Noise Reduction, EQ, Compression, and De-Essing—forms a simple but powerful workflow. While mastering these tools takes practice, applying them at even a basic level will dramatically improve your audio.
Better yet, many audio programs let you save your settings as a preset, so you can apply your custom vocal chain to future recordings with a single click. As you get more comfortable, you can start automating more of your workflow, especially if you're turning recordings into transcripts. For those looking to streamline things even further, it’s worth exploring the best speech to text software available to speed up your entire content creation process.
The New Secret Weapon: AI Audio Enhancement

Let’s be honest. Even with the best recording techniques, sometimes your audio just isn't perfect. That’s where the real magic comes in—and it's powered by AI.
What used to take an audio engineer hours of painstaking work—like surgically removing the hum from an air conditioner or taming the echo in a cavernous room—can now be done with a few clicks. These tools aren't just for pro studios anymore; they give everyday creators an almost unfair advantage.
This isn't a small tweak to your workflow. It's a total game-changer.
Kill Background Noise and Echo Instantly
The most jaw-dropping feature of modern AI tools is how they obliterate unwanted noise and reverb. Picture this: you just recorded a fantastic interview, but a neighbor decided it was the perfect time to mow their lawn. Nightmare scenario, right?
Not anymore. Instead of fighting with complicated EQs and noise gates, you just let an AI handle it. These algorithms have learned the difference between human speech and everything else, so they can isolate and remove the junk with terrifying precision.
- Noise Removal: Tools like Adobe Podcast's "Enhance Speech" can zap consistent background sounds like fans, traffic, and electrical hums.
- Echo Removal: They can also de-reverberate your audio, making a recording from a lively room sound like it was captured in a professional, acoustically-treated space.
The result is a clean, crisp vocal track that sounds polished and professional, no matter where you recorded it. For podcasters and YouTubers, this tech is a lifesaver.
It's no surprise the global AI audio processing market is exploding, projected to jump from $3.8 billion in 2023 to a staggering $18 billion by 2033. This growth shows just how much people crave clear audio. You can see the full market analysis and how quickly these tools are being adopted.
Let AI Do the Tedious Editing for You
AI has moved beyond simple cleanup and is now becoming a smart editor. It can analyze your dialogue and automate the tasks that used to make you want to pull your hair out.
We’ve all been there—editing an hour-long podcast and manually cutting out every single "um," "ah," and "you know." It's mind-numbing. Now, AI can do it for you.
- Filler Word Removal: Software like Descript can find and delete all those hesitations in one go, saving you hours of tedious work.
- Automatic Leveling: If you have multiple speakers, AI can instantly balance their volume levels so no one is too loud or too quiet.
- Studio Sound Simulation: Some tools can even add warmth and richness to your voice, making it sound like you used a high-end microphone in a world-class studio.
These tools dramatically lower the bar for creating broadcast-quality audio.
Once your sound is pristine, the next step is often to get a written version for show notes, articles, or social media. A good audio to text converter makes this effortless, turning your polished recording into an accurate transcript in minutes.
Ultimately, AI doesn't replace the fundamentals of good recording. Think of it as your safety net—a powerful one that ensures your final product always sounds incredible.
Got Audio Questions? Here Are Some Straight Answers
As you get into recording, you’ll quickly realize audio is a world of tiny details. The smallest tweaks can make a huge difference, but it's easy to get bogged down. Let's cut through the noise and tackle the questions I hear most often from creators trying to get their sound right.
Getting clear answers saves you time, money, and a ton of headaches. These are the common sticking points and the practical fixes that actually work.
What’s the Biggest Mistake Beginners Make?
Ignoring the room. Hands down.
It’s so tempting to think a fancy, expensive microphone is a magic bullet. It’s not. I've seen countless people drop hundreds on a top-tier condenser mic, only to set it up in a big, empty room with hardwood floors and bare walls.
The result is always the same: thin, echoey, unprofessional audio. A strategically placed moving blanket or even just a few couch cushions will do more for your sound quality than a new mic in a bad space. Always treat your room first.
Do I Really Need an Audio Interface?
If you're serious about getting a real jump in quality, then yes, absolutely. USB mics have gotten pretty decent, but a dedicated audio interface is a total game-changer. It’s the essential bridge between your microphone's analog signal and your computer's digital brain.
Here’s why it makes such a difference:
- Better Preamps: The preamplifiers inside an interface are lightyears ahead of your computer’s built-in sound card. You get a much cleaner, stronger signal with way less background hiss.
- Stable Power: It provides the consistent 48V phantom power that professional condenser mics need to even turn on, let alone work properly.
- Lower Latency: An interface processes audio way more efficiently, which kills that annoying delay between when you speak and when the sound hits your headphones.
Think of it this way: an interface is the high-octane fuel your high-performance microphone needs to actually perform.
A USC study found that poor audio quality tanks your credibility. Listeners rated speakers with bad audio as less intelligent and their work as less important. Your sound isn't just about clarity; it's a direct reflection of your professionalism.
How Can I Remove Noise from a Recording I Already Made?
It happens to all of us. You nail the perfect take, listen back, and there it is—the hum of an air conditioner or the rumble of a passing truck. Thankfully, you’ve got some powerful tools to clean it up.
Old-school audio software like Audacity has a "Noise Reduction" effect. The process involves selecting a few seconds of pure background noise to create a "noise print." The software then uses that profile to hunt down and remove that specific sound from your entire track.
For more complex noise or for a much faster fix, AI tools are your best friend. Services like Adobe Podcast or Descript can intelligently isolate vocals from background noise with a single click, wiping out everything from buzzing fridges to distant chatter. They can rescue a flawed recording and make it sound shockingly clean.
Once your audio is pristine, you might want a text version for your show notes or a blog post. To make that happen in minutes, you can learn how to transcribe your podcast to text and turn that polished audio into more great content.
At MeowTXT, we turn your polished audio and video files into accurate, editable text in minutes. With support for multiple formats and languages, you can generate transcripts, summaries, and captions effortlessly. Visit https://www.meowtxt.com to get your first 15 minutes free and see how simple transcription can be.


