
Yes, you can absolutely convert video to text for free, and the tools available today are surprisingly powerful. The quickest path is often using built-in features on platforms you already use, like YouTube, or jumping onto a dedicated web tool for a fast, one-off transcription without installing a thing.
Your Practical Starting Point for Free Video Transcription
If you're a creator, marketer, or researcher, you already understand the power of a transcript. It's fuel for SEO, a cornerstone of accessibility, and the key to repurposing your content. We’ll skip the fluff and get straight to the methods that actually work, helping you turn your video library into valuable text without opening your wallet.
The demand for these tools is exploding. The global AI transcription market, which powers most of these free converters, is projected to rocket from $4.5 billion to $19.2 billion by 2034. This growth is driven by creators who need accurate text from their MP4s and other video files to boost their reach. You can dig into the details of this market expansion on Sonix.ai.
Choosing the Right Free Method
So, which free tool is right for you? It really boils down to what you're trying to do. Are you transcribing a single, short video clip, or do you have hours of footage to get through? This decision tree can help you pick the right path for your project.
As the flowchart shows, your choice is a balancing act between convenience, privacy, and volume. Web tools are fantastic for speed and one-off jobs. Local software, on the other hand, gives you unlimited, private use right on your own machine.
Here’s a quick comparison of the main free methods for converting video to text, highlighting their key strengths and best use cases.
A Quick Look at Free Video-to-Text Conversion Methods
| Method | Best For | Key Advantage | Potential Drawback |
|---|---|---|---|
| Platform-Native Tools (e.g., YouTube) | Content creators already on the platform | Fully integrated, no extra steps required | Can be slow to generate; tied to one ecosystem |
| Free Web-Based Converters | Quick, single-file transcriptions | No installation needed; fast turnaround | Privacy concerns; file size or length limits |
| Local Open-Source Software | Privacy-conscious users; bulk processing | Unlimited use, total data control, highly customizable | Requires installation and some technical setup |
| Built-in OS Dictation | Short clips and real-time transcription | Already on your device (Windows/macOS) | Not designed for long-form video files; accuracy varies |
Each method has its place. Your goal is simply to find the most efficient path for your specific task, whether that's grabbing captions for a YouTube video, logging meeting notes, or transcribing an interview.
Just remember the golden rule of transcription: the quality of your audio directly impacts the accuracy of your text.
Key Takeaway: Prepping your audio is the single most important step for getting a usable result from any free tool. A clean audio track can be the difference between a 95% accurate transcript and a messy text file that requires hours of painful cleanup.
How to Prepare Your Video for a High-Quality Transcript
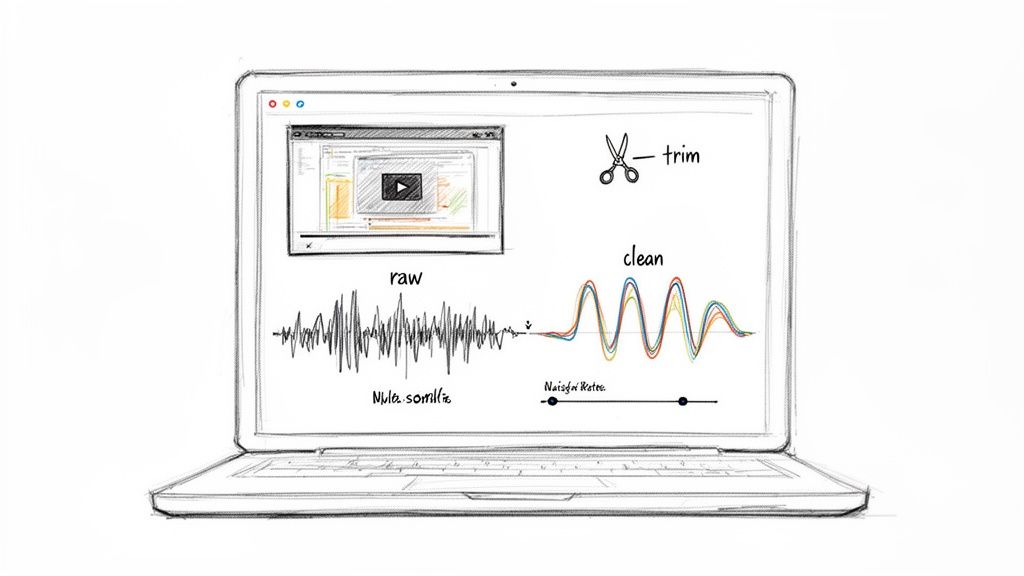
Before you even think about hitting that "transcribe" button, we need to talk about the single most important step in the entire process: prepping your audio. When you want to convert video to text free, the old saying 'garbage in, garbage out' is the absolute truth. An AI transcription tool is only as good as the audio it's fed, and a clean track is the foundation for an accurate, usable transcript.
Think of it this way: these aren't just technical chores. This is the secret to turning a messy, AI-generated text dump into a polished document that needs minimal editing. I’ve seen people skip this part and end up spending more time fixing errors than they saved by using a free tool in the first place.
First, Separate the Audio from the Video
Your initial move is to isolate the audio track from your video file. Most transcription tools, especially the free ones, work much better with dedicated audio files like MP3 or WAV. Stripping the audio out also makes it way easier to perform any cleanup tasks.
You don't need fancy software for this. A powerful, free, open-source tool like Audacity is perfect for the job. You can drag your video file directly into Audacity, and it will automatically extract the audio track for you. From there, just export it as a separate file.
Pro Tip: When you export, choose a high-quality format. While MP3 is common, a lossless format like WAV or FLAC often gives you slightly better results. It preserves more of the original audio data for the AI to analyze, which can make a real difference.
Clean Up Your Audio for Maximum Accuracy
Okay, you've got your audio file. Now, a few simple tweaks can dramatically improve your transcript's quality. I'm not kidding—even five minutes of cleanup can slash the error rate and save you a massive headache later on.
Here are the three key areas I always focus on:
- Reduce Background Noise: Was there an air conditioner humming or traffic sounds in the distance? Audacity has a "Noise Reduction" effect that works wonders. Just highlight a section of pure background noise, let the tool learn what to remove, and then apply it to the entire track.
- Normalize the Volume: If you have multiple speakers, some might be louder than others. The "Normalize" function brings all the audio to a consistent peak level. This ensures the AI doesn't miss quieter voices or get overwhelmed by loud ones.
- Remove Unnecessary Sections: Cut out the long pauses, the irrelevant chatter at the beginning, or any musical intros. This shortens the file and focuses the transcription tool only on the important spoken content.
Getting the best possible audio before you start is crucial. For a deeper dive into techniques, you might find this comprehensive guide on how to extract audio from video helpful. On top of that, learning more about how to improve audio quality can make a massive difference in your final results.
Using Web-Based Tools for Quick and Easy Transcription
Sometimes you just need a transcript, and you need it fast. For a quick job, nothing beats the convenience of a web-based tool. There’s no software to install, no complicated setup—just a fast, straightforward way to convert video to text free.
This is my go-to approach for simple, one-off tasks. Think transcribing a short interview for a blog post or pulling quotes from a quick social media clip. The workflow is almost always the same: you upload your audio file, tell the tool what language was spoken, and hit "transcribe." A few minutes later, you've got your text. Many of these platforms offer a free tier with a monthly minute allowance that’s often more than enough for occasional use.
But let's be real—that convenience comes with a few trade-offs. Before you upload anything, you need to know what you're getting into.
Understanding the Limits and Privacy Concerns
The word "free" rarely means "no strings attached." Most web-based services use their free plans to give you a taste of the service, hoping you'll upgrade. Knowing the limitations up front will save you a ton of frustration.
Here’s what you’ll typically run into:
- File Size Caps: Many free tools won't accept files larger than 100MB or so. This can be a deal-breaker for longer, high-quality recordings.
- Minute Limits: It's common to get a small bucket of free minutes each month, like 30 minutes, that resets on a specific date.
- Feature Restrictions: Want cool features like automatic speaker labels or different export formats? Those are almost always locked behind the paywall.
Beyond the functional caps, the biggest issue is privacy. When you upload a file to a free online service, where does it go? What happens to your data? The answers are usually buried deep in a privacy policy that nobody ever reads. We touch on these points in our broader guide on the best video to text converter tools, and it's a critical point to consider.
Crucial Consideration: Never, ever upload sensitive content—like a confidential client meeting or an unreleased interview—without checking the privacy policy first. Some services reserve the right to use your data to train their AI models, which might be a deal-breaker for you.
A Quick Checklist for Evaluating Free Online Tools
Not all free services are built the same. Before you hand over your files to just any website, run through this quick checklist. A couple of minutes of vetting can save you from choosing a tool that's not just inconvenient, but also insecure. For creators working with short-form content, specialized platforms like shortgenius might offer features tailored to that workflow.
Your 4-Point Vetting Process:
- Check the Privacy Policy: Look for clear language on data retention. Do they delete your files right after processing? Do they use your content to train their AI? If you can't find a clear answer, that's a red flag.
- Understand the Limits: How many minutes do you actually get? What’s the max file size? Make sure the free plan can handle the scope of your project before you waste time uploading.
- Test for Accuracy: Don't transcribe an hour-long file just to find out the quality is terrible. Upload a short, clean audio clip (1-2 minutes) and see how it performs. Is the transcript usable out of the box, or will it need a ton of editing?
- Review Export Options: Can you actually get the transcript out in a format you need? A basic .TXT file is standard, but if you need an .SRT file for captions, make sure that's an option.
When free web tools feel too restrictive and privacy is a deal-breaker, it’s time to take things in-house. For creators, researchers, or anyone handling sensitive content, running transcription software locally on your own computer is the ultimate power move.
This approach gives you unlimited use, total privacy, and a level of control that most online services hide behind a paywall.
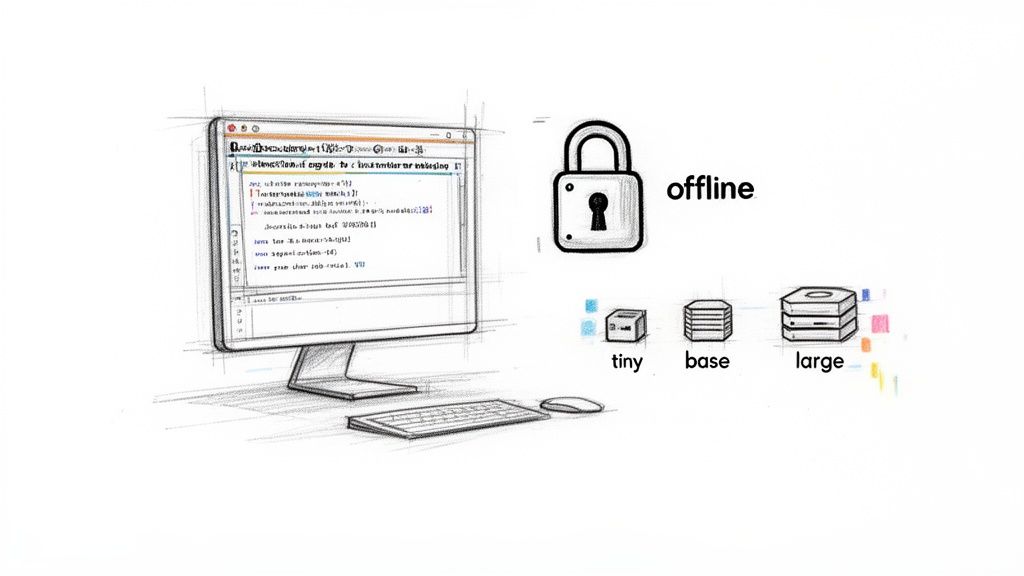
Enter the world of open-source software, with tools like OpenAI's Whisper leading the charge. Think of it as a powerful transcription engine you install and run entirely offline. Your files never touch a third-party server, making it the perfect choice for confidential meetings, unreleased interviews, or proprietary research. You get all the benefits of high-end AI without the data privacy headaches.
The best part? It completely obliterates the limits you find with online tools. No more monthly minute caps, no frustrating file size restrictions, and no waiting in a queue.
Getting Started with Local Transcription
Diving into local software might sound intimidating, but it’s gotten a lot more accessible. The core idea is simple: you use your computer's own processing power—specifically, its graphics card (GPU) or CPU—to run the AI model and generate the transcript.
While a powerful computer with a modern graphics card will churn through files the fastest, you don't need a high-end gaming rig. Many of these tools run just fine on a standard laptop; the transcription will simply take a bit longer to finish.
The real advantage here is empowerment. Running transcriptions locally puts you in the driver’s seat. You control the process from start to finish, ensuring your data remains completely private and secure on your own machine.
The efficiency gains are no joke. AI tools can now convert video to text at 3-5x real-time speeds, a massive workflow shift for podcasters and YouTubers. Marketing teams frequently repurpose these transcripts into blog posts, a strategy shown to boost SEO by 20-30%. You can dig deeper into these AI efficiency findings on Sonix.ai.
Choosing the Right Model for Speed vs. Accuracy
One of the coolest things about open-source tools like Whisper is that you get to choose the "size" of the AI model you use. This decision is a direct trade-off between how fast the transcription runs and how accurate it is.
Here’s a quick rundown of the common model sizes:
- Tiny & Base Models: These are the featherweights. They're small, fast, and don't demand much computing power. They're great for getting a quick, rough draft or if you're working on an older machine, but expect to do more editing.
- Small & Medium Models: This is the sweet spot for most people. They offer a fantastic balance of speed and high accuracy, making them the go-to choice for transcribing interviews, podcasts, or lectures.
- Large Model: This is the heavyweight champion. It's the most powerful and accurate model, excelling at understanding tricky audio with background noise, multiple speakers, or heavy accents. The catch is that it needs more processing power and takes the longest to run.
By picking the right model, you can tailor the tool perfectly to your project's needs and your computer's capabilities—something most online services just don't offer. This method truly offers a way to convert video to text free and without compromise.
How to Edit and Format Your Transcript Like a Pro
Getting that raw text dump after you convert your video is a great start, but it's just that—a start. Think of the AI's output as a rough first draft. It did all the heavy lifting, but now it needs a human touch to turn it into something genuinely useful.
This cleanup stage is absolutely essential if your transcript is destined for a blog post, polished video captions, or professional notes. Don't skip it.
My own workflow for this is pretty simple but incredibly effective. I just pop the video open on one side of my screen and the text file on the other. This lets me listen and read at the same time, making it way easier to catch weird phrasing or outright mistakes without constantly flipping between windows.
Efficiently Cleaning Up Your Raw Text
Instead of just reading the whole thing from start to finish, I hunt for common AI slip-ups first. This targeted approach saves a surprising amount of time and knocks out the most obvious problems right away.
I always kick things off with a "Find and Replace" pass. If the AI consistently messes up a speaker's name or a technical term (like spelling "Meow Txt" instead of "Meowtxt"), I can fix every single instance in seconds.
Here’s the quick checklist I run through:
- Fix Speaker Names and Proper Nouns: AI is notorious for mangling names, brands, and any kind of specific jargon. Correcting these adds a layer of professionalism instantly.
- Correct Punctuation: AI-generated punctuation can be a total mess. I focus on adding proper sentence breaks, commas, and question marks to make the text actually readable.
- Standardize Formatting: Add labels like "Host:" or "Sarah:" to clearly show who's talking. This simple step turns a confusing wall of text into a clear, followable dialogue.
Choosing the Right Export Format
Once your text is clean and sparkling, the final move is to pick the right file format for the job. This is a bigger deal than it sounds, since the format you choose determines exactly how and where you can use the transcript.
Your transcript is only as useful as its format. A plain text file is great for a blog post, but it's completely useless if you need perfectly synced video captions. Choosing the right export option is key to making your content work for you.
A .TXT or .DOCX file is your best bet for written content—think articles, show notes, or meeting minutes. These are universally compatible and super easy to edit later on.
But for video captions, you need something more specialized, like an .SRT (SubRip Subtitle) file. This format contains not just the words but also the crucial timestamps that sync the text to the audio. Without those timestamps, your captions won't show up at the right time.
If you want to get into the weeds on this, check out our guide on how to create SRT files for your videos.
Knowing When to Upgrade from Free to Paid Transcription
Free tools are incredible for getting started. Honestly, they’re perfect for the occasional one-off project. But there comes a point where the time you spend wrestling with a messy, machine-generated transcript costs you more than a cheap paid service.
Figuring out that tipping point is key. Here's a rule of thumb I use: if you find yourself spending more than 15-20 minutes cleaning up a single 10-minute video, it's a clear signal you’ve outgrown free solutions.
This isn't just about convenience; it's about reclaiming your time and unlocking features that genuinely speed up your workflow. For instance, most free tools completely fall apart when multiple people are talking over each other. A good paid service, on the other hand, almost always includes automatic speaker identification. It cleanly labels who is speaking and when—a lifesaver that can save you literal hours on interviews or team meetings.

Key Benefits of Paid Transcription Services
When you finally make the jump, you're not just paying for a transcript—you're investing in accuracy and speed. Paid services consistently deliver higher accuracy rates, often hitting 97% or more. That difference drastically cuts down your editing time. They also process files way faster, turning around hours of footage in just minutes.
This demand for efficiency is why the US transcription market is projected to balloon to $41.93 billion by 2030. Professionals rely on these tools for everything from AI accuracy to privacy features, like the auto-deletion of sensitive files. Business teams use speaker ID to log meetings, and educators can generate instant AI summaries of lectures. You can dig into the growth of the transcription market on GrandViewResearch.com to see the full picture.
Your time has a dollar value. If a cheap subscription saves you five hours of manual editing a month, the service pays for itself. The goal is to spend your time creating, not correcting.
It's probably time to consider a premium service if you:
- Regularly transcribe videos longer than 15 minutes.
- Need dead-accurate transcripts for client work or professional documentation.
- Work with messy audio that has multiple speakers, thick accents, or background noise.
- Want to plug transcription directly into your content workflow without a ton of manual steps.
So, while you can always convert video to text free, upgrading is the smarter long-term move once your content volume or accuracy needs start to climb.
A Few Common Questions About Converting Video to Text
Jumping into free video transcription usually sparks a few questions, especially when you're aiming for great results without opening your wallet. Let's tackle some of the most common ones I hear.
The big one is always about accuracy. How good are these free tools, really? The truth is, they've gotten surprisingly good, often hitting 85-95% accuracy. But that's in a perfect world: crystal-clear audio, one person talking, and zero background noise. Add multiple speakers, a bit of echo, or some cafe chatter, and that number can drop. A quick human proofread is non-negotiable.
Which Text Format Should I Choose?
This completely depends on what you plan to do with the transcript. There's no single "best" format, only the right one for your goal.
- .TXT (Plain Text): This is your workhorse. It's perfect if you're turning the transcript into a blog post, article, or just raw notes. It’s clean, simple, and works everywhere.
- .SRT (SubRip Subtitle): If you need video captions, this is the only format that matters. An SRT file is more than just words; it contains the critical timestamps that sync the text to your video, making it accessible for everyone.
Are Free Online Tools Safe for My Videos?
This is a smart question, and one you should always ask. When you upload your video to a free web tool, you're sending your data to someone else's server. For anything sensitive—like a confidential client meeting or an unreleased interview—you absolutely must read their privacy policy.
For anything truly confidential, your safest bet is to use an offline, open-source tool. This guarantees your video file never leaves your computer, giving you total privacy and control.
Ready to skip the limits of free tools and get fast, highly accurate transcripts? Meowtxt offers up to 97.5% accuracy, automatic speaker identification, and blazing-fast processing. Get your first 15 minutes free and see the difference.


